
Last Updated on
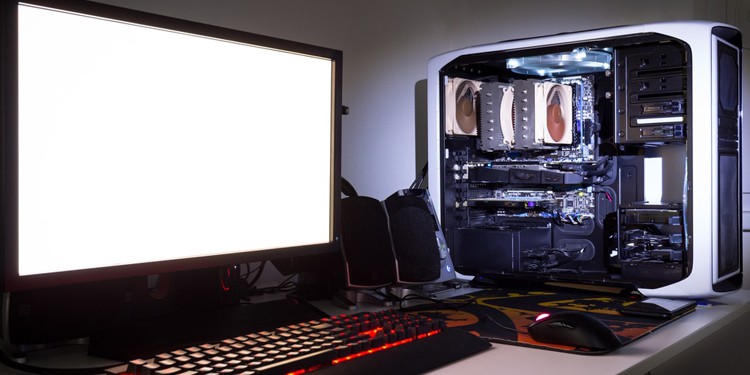
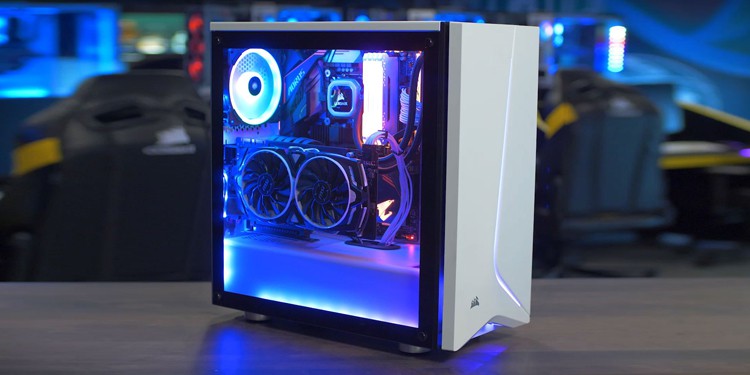
Good computer cable management is essential when building a computer. Not only does it keep everything in order– and order is good– but it also improves airflow inside your case.
Remember you’ll want thermal-resistant cables since heat is inevitable inside the case. Good thing most cables these days– specifically, computer wires– can withstand temps between 60-70 degrees Celsius. But even so, it’s still best that you follow effective cable management tips to achieve even airflow.
In this article, we will cover everything you will possibly need if you want to know how to cable manage a PC like a pro, such as:
- Items you’ll need to make cable management smooth and easy
- A detailed step-by-step guide detailing how to actually do the managing
What Do You Need?
Doing this right may sound a bit challenging but as long as you have the right tools, it shouldn’t be hard. Remember: there’s no one-size-fits-all solution to your cable managing woes. This is why the tools you’ll need may vary slightly.
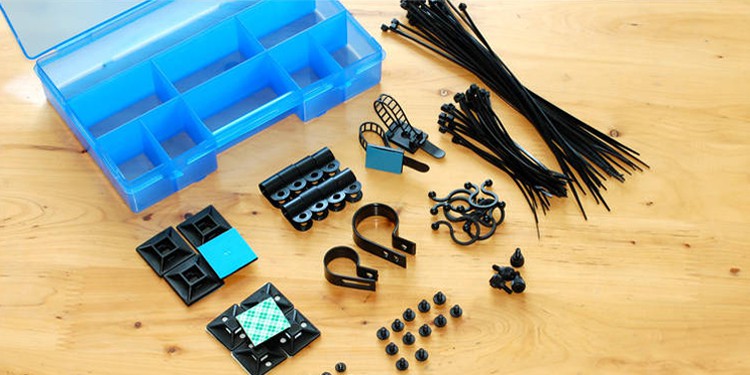
Here are the things you’ll need:
- Zip Ties or Velcro Straps – Some cases come with either Zip ties and/or Velcro straps pre-installed. However, it’s likely that there won’t be enough included. As such, regardless of which you decide to use, make sure you get some beforehand.
- Wire Cutters – We only recommend wire cutters if you’re going to use zip ties. And if you don’t have one, forget about using a razor blade as you risk slicing your fingers (trust me, I made this mistake more than twice already). Instead, use some scissors, or even a pair of fingernail clippers.
- Anti-Static Wrist Strap – You’ll be touching hardware components when routing and managing your cables. They aren’t exactly necessary, but a $5 anti-static wrist equipment is worth ensuring your computer that’s worth hundreds– or even thousands– of dollars.
- Adhesive Cable Clamps – These are optional, especially since cases in 2019 usually already have built-in cable management features. But considering how well they keep the cables tidy, why not?
- Philips #2 Screwdriver – It’s not necessary but we felt the need to include this since you’ll probably need it to remove pre-installed components.
That’s it– and if you’re really on a budget, twist ties, hair ties, or even rubber bands can get the job done. But remember, due to heat and general wear, rubber bands will probably become brittle and fall apart. For temporary use, however, it shouldn’t be a problem.
It’s Time to Wrap Them Up!
Before the actual steps, let’s first cover cable management tips and things to keep in mind before starting.
Planning ahead ensures you a future-proof build that’ll last over the next 2-4 years, so until you need to start making some upgrades. At the same time, it’s also a way to ensure you’re doing everything right.
Choose the Right Case
Not all computer cases are created equal. Some cases are small (and even smaller) while some are big. Some cases are separated into two separate sections. And many cases nowadays have glass window panels.
If you’re a first time builder (welcome to the true master race) save yourself the hassle and headache and get a case that has plenty of room for all the cables and has enough numbers of cable routing holes.
More importantly, check the spacing between the motherboard tray and the back panel. If you’re going to load your case with tons of RGB lighting and a large CPU cooler, you’ll definitely want a bigger case and a spacious back panel to route them easily.
Component Placement
The arrangement and placement of components vary from one case to another. Some components– like the HDD, SSD, and graphics card– can be placed in different positions in different areas inside the case, while some components can’t be moved once they’re installed.
This is why it’s important that you check all the routing holes ahead to see which holes the computer wires will be routed through. Play around with the position and place them such that as much of the cable is routed behind the tray.
What Type of Power Supply Should You Get?
Most of the cables inside the case come from the PSU, making it a central consideration in computer cable management. There are three types of power supplies you can buy:
- Non-modular power supply – have every cable pre-attached and cannot be removed. These are usually the cheapest, but also the most cumbersome.
- Semi-modular power supply – also referred to as the hybrid PSU. These have the main power cables– 24-pin ATX cable, PCIe cable, and 8-pin CPU cable– pre-attached and are unremovable. The rest of the peripheral cables are modular.
- Fully-modular power supply – these PSUs let you remove everything, including cables that are essential to running the system.
Obviously, fully-modular power supplies are the way to go. But this isn’t always the right choice for consumers because they cost a premium and they may not be perfect for the type of setup you’re planning to achieve (ie a cheap one).
If you’re a first-time builder, a non-modular power supply is a smart choice. This lets you build without having to worry which cables you need and which you don’t. However, this will make it more difficult to actually manage your wires, so keep that in mind.
A semi-modular power supply is the perfect option for most users. You get both aesthetics and maximum air cooling potential due to the absence of cables you don’t need without having to spend a fortune.
Use the Right Type of ESD-Compliant Ties/Tape
Although there’s nothing wrong with plastic zip ties, they aren’t as reusable as straps, sleeves, combs, Velcro straps, and twist-ties.
However, there’s one thing you have to keep in mind when choosing ties to tidy up your cables: they have to be ESD-compliant (electrostatic discharge compliant).
It’s a known fact that ESD can harm hardware components and paying a little more for security on ESD-compliant ties/tape can go a long way. Plus, most of these types of cables have different color themes, which also gives you the option to choose according to your setup or theme.
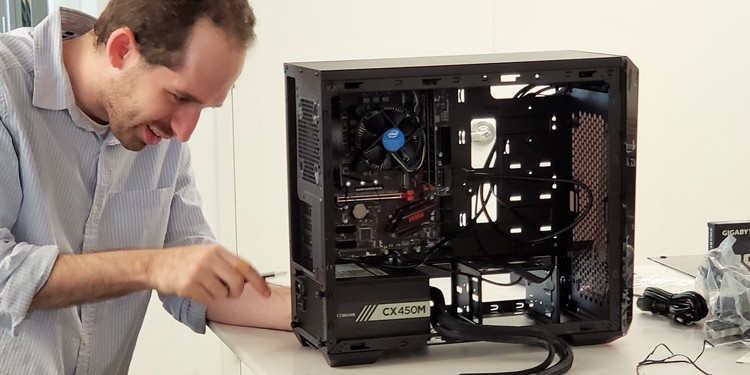
Proper Steps to Managing Your Computer Wires
1. Unplug everything from the PC
If you’re planning to manage the cables inside your old computer, unplug your PC from the wall outlet. In fact, we even highly recommend you unplug everything inside the case to make PC cable management easier.
2. Ground yourself with anti-static equipment
As stated above, you’ll be touching hardware components from start to finish. This is why we recommend a $5 anti-static wrist strap as insurance to keep your several hundred-dollar or even thousand-dollar computer safe.
3. Open your case
Like most cases, take the thumbscrews out of the back of the case and slide the covers to pry the case open. In some cases, you’re going to need a Philips #2 Screwdriver to unscrew the bolts from the case.
4. Separate the cables into groups
If you have a non-modular power supply, separate and group the cables you’re going to be using from the cables you won’t be needing. This will make PC cord management easier for you later on.
If you’re using a semi-modular power supply, check which cables you’re going to be using and plan your PC cable management ahead.
For users using a fully-modular power supply, just take what you need and check which holes the cables should be routed to.
5. Gather all the cables you need first
With all the cables grouped and separated, check which cables you’re going to need first.
6. Route the cables
When routing the cables, make sure they’re not bent or twisted too much.
7. Plug the cables in
When plugging the cables in, make sure the cables aren’t blocking the airflow inside.
8. Plug in accessories such as fans, case USB, and case audio
Once you’re done with the primary cables, plug the remaining cables from the case fans, the case USB, and the case audio to the motherboard while making sure they’re not blocking the airflow or placed in a risky position.
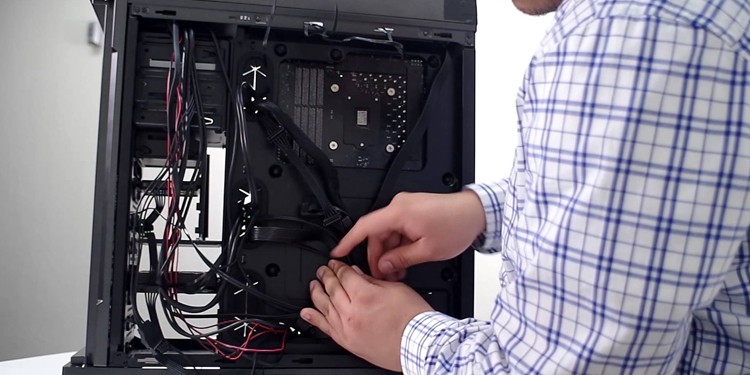
9. Gather up all the excess cables
Now with all the cables plugged in, it’s time to gather the excess cables and tie them together with the Velcro straps, zip ties, and wire cutters. If you have adhesive cable clamps, feel free to use them to tidy up the excess cables.
10. Use ties to secure cables and connectors to prevent excessive movement
With everything tied together, tuck the excess cables in a safe area that’s also well-hidden from plain sight. Use zip ties or Velcro straps if necessary.
What About the Outside Cables?
The principle is the same– you can use zip ties and Velcro straps to clean the cables on your desk. Alternatively, using a spiral wire wrap is a great way to keep all your wires together and hidden away from plain sight.
Wrapping it Up
Patience is critical if you want to achieve the right PC cord management. But by following the right process as indicated above, you should be able to achieve clutter-free wiring from the front and the back.
If you really want a wire-free setup, there are plenty of wireless gaming peripherals available online now. Unlike five years ago, some of today’s wireless keyboards and wireless mice now perform just as good or even better than wired peripherals.