Last Updated on
When it comes to building a great gaming computer, the importance of choosing the right motherboard cannot be overstated.
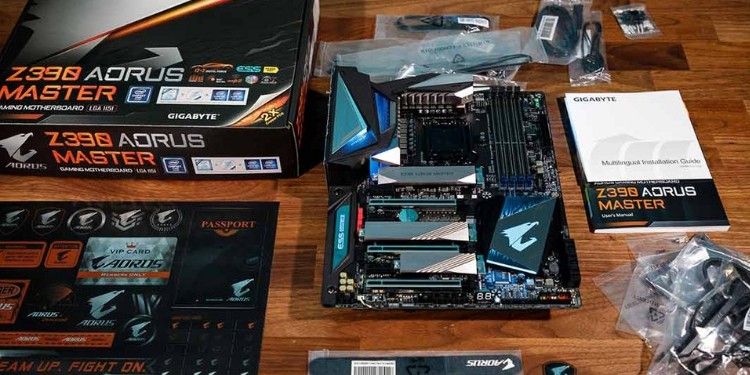
The motherboard is the glue that holds your rig together. It determines the amount and speed of RAM you can use and the number of storage drives, GPUs, and system fans. It also determines CPU compatibility and whether you can overclock or not. Motherboards come in different form factors with different socket types and chipsets, as well.
In short, it can get really complicated really fast and picking the wrong board could damage your parts, waste your time/money while ordering the proper components, or lower the ceiling your rig can reach before you’ve ever even put it together. Don’t worry though; that’s what our top 8 best motherboards for gaming in 2019 are here for.
How to Pick the Best Gaming Motherboard for Your Needs
Trying to find the best motherboard for gaming is hard and choosing a motherboard is important– after all, it holds your system together.
Let me explain: your CPU, GPU, RAM, hard drives, optical drives, case fans, and everything else in your PC connects to your motherboard.
If you don’t have the right socket type, your CPU won’t fit; if you don’t have the right chipset, you won’t be able to overclock; if you don’t have enough SATA connections, you won’t be able to hook up all of your drives.
As you can see, you have to plan well before you buy your motherboard.
However, just because your motherboard is important, doesn’t mean it has to be expensive. In fact, unless you’re building an elite gaming PC, you won’t have to spend but maybe $150- $100 on your motherboard because it won’t be loaded down with a lot of features you’ll never use.
Form Factor
There are several different motherboard form factors out there. ATX is the standard, but Micro-ATX and Mini-ITX boards are becoming more popular. There is also the slightly larger E-ATX (Extended ATX).
Since form factor literally refers to the size, it is going to restrict the types of cases you can use your motherboard in; the larger the board, the larger the case needs to be to fit it. As such, you should always take a look at the motherboard form factor.
When you’re choosing which size is best for you, think about the components you’ll be using. If you’re going to rock a bunch of RAM, a big water cooler, and several GPUs, you’re going to need a bigger board. On the flip side, if you were wanting to make a smaller PC, then you will want an ITX board.
ATX should be fine for most people, and it’s what I’d recommend for beginners as they’re the easiest to work with.
Socket Type
This one is pretty important. Before you choose your motherboard, select a CPU. Different CPUs have different socket types based on the CPU architecture and its manufacturer. After you pick your CPU, you’ll have to pick a motherboard with a compatible socket type.
For instance, you can’t use an Intel motherboard with an AMD CPU.
Chipset
Different motherboard chipsets have different capabilities. Chipsets actually do a lot behind the scenes, but we’re only going to be talking about overclocking here due to the scope of this beginner’s guide.
When choosing your CPU, you should have decided whether or not you wanted to overclock.
If no, then this is simple. Just buy a cheaper chipset that doesn’t support overclocking because you won’t need it.
If yes, then it’s actually still relatively simple: choose a chipset that supports overclocking. Keep in mind that some chipsets are better for overclocking than others – that is to say, they can achieve higher frequencies, and they’re more stable. You’ll have to do your research here.
Ports/Connectors
Lastly, you’ll want to make sure your motherboard has enough DIMM slots, PCI slots, and other connectors for everything in your PC. Check the number of SATA cable connectors, PCI slots, and DIMM slots for RAM. Also, make note of the supported RAM frequencies.
Four DIMM slots should be sufficient for most people – in fact, my motherboard only has two DIMM slots, and I have two 4GB sticks installed for a total of 8GB.
If you choose to buy a motherboard with only two DIMM slots, think about upgradeability. If your motherboard had four DIMM slots, for instance, and you bought two 4GB sticks now, you could still add two more 4GB sticks in the future for a total of 16GB.
Conversely, if you only have two DIMM slots and you want to upgrade to 16GB later on, you’ll have to replace the two existing 4GB sticks with two 8GB sticks.
The number of PCI slots on your board and their type should be determined by the number of graphics cards you’re going to use, in addition to any WiFi or sound cards, M.2 SSDs, etc.
You should also pay close attention to the number of USB ports, both internal and external, in addition to the number of fan headers, display ports, etc.
BIOS
For more info on BIOS, check out this short video. If you’re going to be tinkering around a lot– like overclocking– then you will also want to be knowledgeable about the BIOS your motherboard comes with. Some BIOS need to be updated on older motherboards before they’ll be compatible with newer CPUs.
Make sure your BIOS doesn’t need to be updated beforehand– otherwise, you may not be able to use your CPU unless you have an older, compatible CPU to update your BIOS.
In particular, you might want to be aware of this for AMD motherboards/processors since they have used the same socket for the past couple generations (Intel has traditionally changed their sockets every generation).
Once you’ve found a motherboard that meets all of your criteria, you’re good to go!


