Last Updated on
The easiest way to partition a hard drive in Windows 10 is with Windows’ built-in Disk Management tool. You can use third-party applications that have more features than the built-in tool, but the standard tool is more than capable of creating new partitions.
In this article we will show you how to partition a hard drive for Windows 10, but these steps can also be applied to Windows 8.1 as the process is pretty much identical. Let’s get started!
Partitioning A Hard Drive For Windows 10 In 10 Steps
Step
Disk Management, ‘Create And Format Hard Disk Partitions’
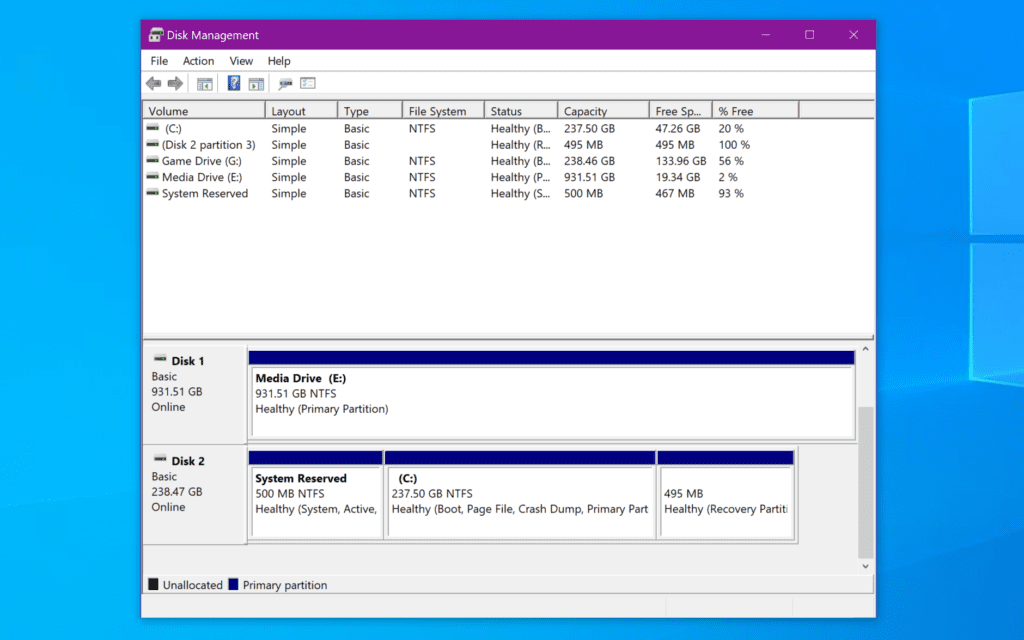
Search for Disk Management in the Windows search bar.
Select Create and Format Hard Disk Partitions.
Or you can use the Windows Power User menu (Windows key + X) and select Disk Management.
Step
Select The Hard Drive You Wish To Partition
A list of drives will appear. Select the hard drive you wish to partition. If you wish to partition a new drive, jump to step 5.
If you are partitioning an existing drive with files already on it – or your operating system is installed on it – you’ll need to free up some space before you can partition it.
Right-click and select Shrink Volume from the drop-down menu that appears.
Step
Configure Hard Drive Before Clicking Shrink
Your PC will determine how much space you can have free for the new partition. Once your PC has checked how much space you have, it will ask you how much space you need.
If you want to use the free space on the hard drive, click Shrink. If you want to specify the partition size, input the space in megabytes before clicking Shrink.
Step
Wait For The Process To Finish
The process may take a minute, depending on how fast your drive is.
When the process is complete, you will be able to see new unallocated space next to the corresponding physical drive in the lower half of the Disk Management window.
Step
Select New Simple Volume
Right-click the unallocated space and select New Simple Volume on the menu that appears.
Step
Select Size
Follow the instructions on screen and select the size of the volume (the default size will use all the unallocated space) and the drive letter.
It’s a good idea to format new and old drives when creating a new partition to ensure a drive is clean and primed for use. So if you have the option to do so, we recommend you do this.
Step
Select File System
For File System, select NTFS. For portable devices, the ExFAT option is often used.
Step
Configure Hard Drive Data
If you like you can also add a volume label (a name). You can also leave the allocation unit size at default.
However, if you don’t have enough time, click Quick Format. You don’t always need a full format.
Step
Keep Clicking Next Then Finish
Keep clicking through the Next buttons and, finally click Finish to create the volume. Your hard drive will now have a new partition with its own designation.
You will now be able to view it and access all the information on the Disk Management page.
Final Thoughts
Partitioning a hard drive is recommended if you want to install an additional operating system on your PC (say Linux), for security and for performance. Or, if you want to separate data to ensure it is safer should corruption occur.
Partitioning a hard drive in Windows 10 lets you split up your hard drives into specific portions that your PC will recognize. Each hard drive has at least one partition, and this is normally called ‘C.’ However, you can make more partitions on a single drive.
If you want to do something more complex than creating, deleting, or shrinking new partitions (let say, cloning a drive or partition) specific third-party hard drive partition tools, or having a professional partition your drives, may be easier.