
Last Updated on
If you have read our review on the Oculus Quest you will know that it gets so many things right, with just a few caveats that may well be deal-breakers to some people. However, one of these issues should not be the inability to buy and play Minecraft – probably the best game ever created and I’m not getting into an argument about that!
Oculus Quest 2 Specs
Now Minecraft is not the most taxing of games in many ways but equally, as great as the Quest is, it’s still basically mobile processor and screen so some things are going to be tricky. Let’s have a look at the Quest’s specs.
- CPU: Qualcomm Snapdragon XR2
- RAM: 6GB
- Resolution: 1832 x 1920
- Refresh rate: 90 Hz
- Storage: 64GB / 256GB
- Integrated speakers and microphone
- 2-3 hours of battery life
- Adjustable IPD with three settings for 58, 63, and 68mm
- Redesigned controllers
How to play Minecraft in VR
You have been able to play Minecraft in VR since headsets started to arrive but for some, it’s never been quite as simple as it may be. Part of the issue is the differing versions of the game you might own – do you have the Bedrock or the Java version for starters? Then there is a native version in the Oculus Rift store, but you could well be fed up of buying separate versions.
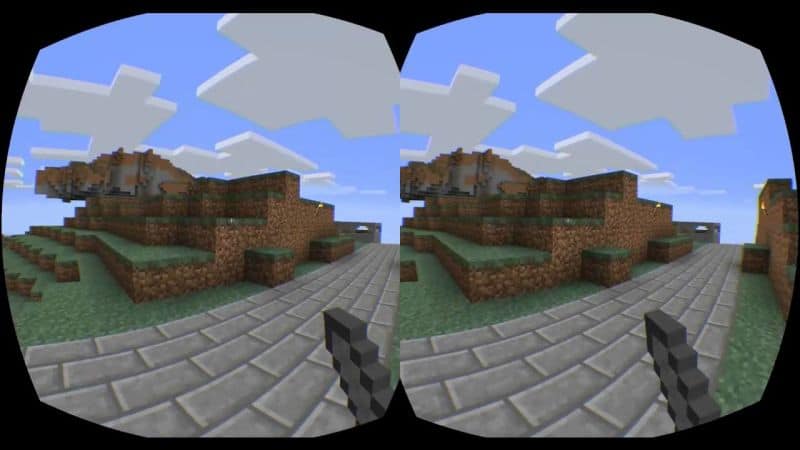
Minecraft in VR is also not for everybody. Despite Mojang’s outstanding efforts, some people find moving around in the blocky landscape a little too much for the stomach. There is an option to play it on a kind of cinema-type screen but that is not what Minecraft VR is all about really. If you are one of the people who can play without VR sickness though, bringing those Minecraft worlds you have made to life in front of your very eyes can be a humbling experience.
Minecraft VR on the Oculus Quest
Unfortunately getting Minecraft to work flawlessly on the Quest or Quest 2 is going to need a little extra work on your part but things are relatively simple still.
Note: You are going to need to own the Java version of the game. The Windows 10 app version isn’t going to work, unfortunately. If you have that version of the game then just follow these steps and you will be up and running in next to no time.
- Install Java on your PC if you don’t already have it (you probably do though)
- Make sure you have a copy of Minecraft Java Edition downloaded and installed
- Run the game normally to make sure everything works as you would expect
- Google and download the latest version of SteamVR for your PC
- Now download and install Vivecraft
- Open Minecraft Jave Edition and choose the Vivecraft profile
- Install the Virtual Desktop Streamer application on your Quest/Quest 2
- Connect your Quest to your PC with a USB 3.0 cable
- You can now play Minecraft on your Quest 2 until your heart’s content
Issues
You can’t obviously take advantage of the Quest’s portability as you have to be connected to your PC which will be doing all the heavy lifting. This, unfortunately, means you can’t take Minecraft on the go with you, such as on vacation but until the point, if ever, we get a definitive Quest version of Minecraft it is the best we can manage.
Minecraft VR Oculus
If you decide you want to play regular Minecraft VR in a Rift or Rift S rather than use an Oculus Quest headset, by doing so you will be able to access these enhanced controls and features:
ENHANCED OPTIONS FOR VR
When playing the game for the first time you will be asked to select a preferred control scheme:
VR Controls (recommended) or the Classic control scheme.
You can also toggle individual features in the Options Menu. You can reach this through the Pause screen by pressing the Menu button (gamepad).
Virtual Living Room
When entering the game, the player is placed in a static environment we have dubbed the Living Room. The viewpoint is still VR and the player can look around the room but the gameplay is fixed on the virtual screen in front of them. The player can play the game entirely in this mode with access to all features, or toggle the Immersive Mode, by pressing the change view button – this pulls the player into the virtual screen as the world envelops them in the completely 360-degree, rendered point of view.
Based on your VR headset, this button layout may be different. Check your Living Room HUD to make sure you know which to press.
Options: VR Menu
The player’s gameplay and interaction with the VR world is primarily controlled through a dedicated set of options that are presented to the player in a new VR Options menu that is accessed through the Menu button on the gamepad. Our recommended defaults are marked in bold below.
VR Controls
- [ON] VR Controls (In Progress). All VR Options default to ON if these controls are selected.
- [OFF] Classic Controls. Options for VR Head Steering, Linear Jump, VR Turning and VR Turning Sound are ignored.
Show Control Selection Screen
At startup, the player is shown a UI screen where they have to pick the VR control selection. Turning this option off stops displaying this screen and the last selected control option is saved. Players can turn this option back on which starts displaying the screen again.
VR Turning
This is only available in Immersive Mode.
- [ON] Turing is done in segments (default for VR Controls (In Progress)).
- [OFF] Classic Controls turning is turned on. Note that VR Turn by Time setting is ignored.
VR Turn by Time
This is only available in Immersive Mode.
- [ON] VR Turn has the same number of turns per second, but the angles are different based on how far the Right Stick is pushed.
- [OFF] VR Turn occurs with a constant angle.
VR Turning Sound
This is only available in Immersive Mode.
- [ON] A distinctive sound plays every time the player turns.
- [OFF] No sound plays when turning.
Head Steering
- [ON] The direction of motion of the character follows the player’s POV (gaze direction).
- [OFF] If the character is moving, direction of motion is independent of POV. The character turns in relation to POV only if they are stationary.
3D Rendering
- [ON] This option turns on stereoscopic rendering when in Immersive Mode and slightly lowers the draw distance to try to maintain a steady frame rate.
- [OFF] The world will render as monoscopic and the frame rate is higher, since only one frame is rendered to both eyes.
Linear Jump
- [ON] The Jump is a 2-stage linear jump, which removes the variable velocity and acceleration/deceleration from the jump. It also jumps the same height as a block instead of slightly higher.
- [OFF] The game uses the Classic Controls jumping HUD Drift
HUD Drift
- [ON] HUD is allowed to “float” for comfort.
- [OFF] HUD is fixed in position to player’s POV.
Linear Motion
When turned on, the player’s velocity is constant with all acceleration/deceleration disabled.
Sticky Mining
- [ON] Causes the cursor to remain locked on the currently mined block until the block is destroyed. If the player POV moves to another block, a second cursor (a small, hovering white dot) appears to guide the player and highlight which block will be targeted next.
- [OFF] The cursor moves freely as the player shifts their POV while mining. It is possible to interrupt mining if the player’s gaze shifts off the current block.
Options: Controls
VR Sensitivity
This control function is altered when playing in Immersive Mode. It affects the turn speed of both Classic Mode (Sensitivity) and VR Turning controls.
VR Auto-Jump
This control function is altered when playing in Immersive Mode. It turns this behavior on and off in VR, but doesn’t affect the Classic Mode Auto-Jump.
Options: Graphics
VR Brightness
This adjusts the brightness of the game in both VR Modes (Immersive and Living Room).
VR Render Distance
This adjusts the Render Distance of the game in both VR Modes (Immersive and Living Room). Setting this too high may reduce frame rate and cause discomfort.
Texel Anti-Aliasing
This option is not supported on Note 4 and is therefore hidden.
- [ON] Anti-aliasing of block textures is enabled for improved visual quality. Frame rate will be reduced.
- [OFF] Anti-aliasing of block textures is disabled.