
Last Updated on
AirDrop is Apple’s free file sharing service. It allows you to send files from your iPhone or iPad to other iOS devices within Bluetooth range. The recipient has to accept the transfer before they receive the file. AirDrop is also useful for sending photos, music, movies, and documents between two iPhones or iPads. Here we’ll show you how to turn it on and use it.
How Does AirDrop Share Files?
AirDrop is a very popular service among iOS users as it is a much quicker way of sharing files than sending them over any messaging service.
AirDrop works by using Bluetooth and WiFi technology. This means that all communication takes place directly between two devices without having to go through the Internet. When you open up AirDrop on an iOS device, you’ll see a list of nearby devices.
Once you choose the Apple device that you want to send the files to, the Bluetooth and WiFi connections will work together to send the files between two devices. Both devices will need to have Bluetooth and WiFi turned on and be within 30 feet of one another.
Turning AirDrop On With An iPhone Or iPad
Both iPhone and iPad both work with the same software so the method of turning AirDrop on both of these devices is the same.
All you need to turn AirDrop on, on your iPhone or iPad, is access to the control center or the settings. Here’s a step-by-step of how to turn AirDrop on.
Step
Access The Control Center
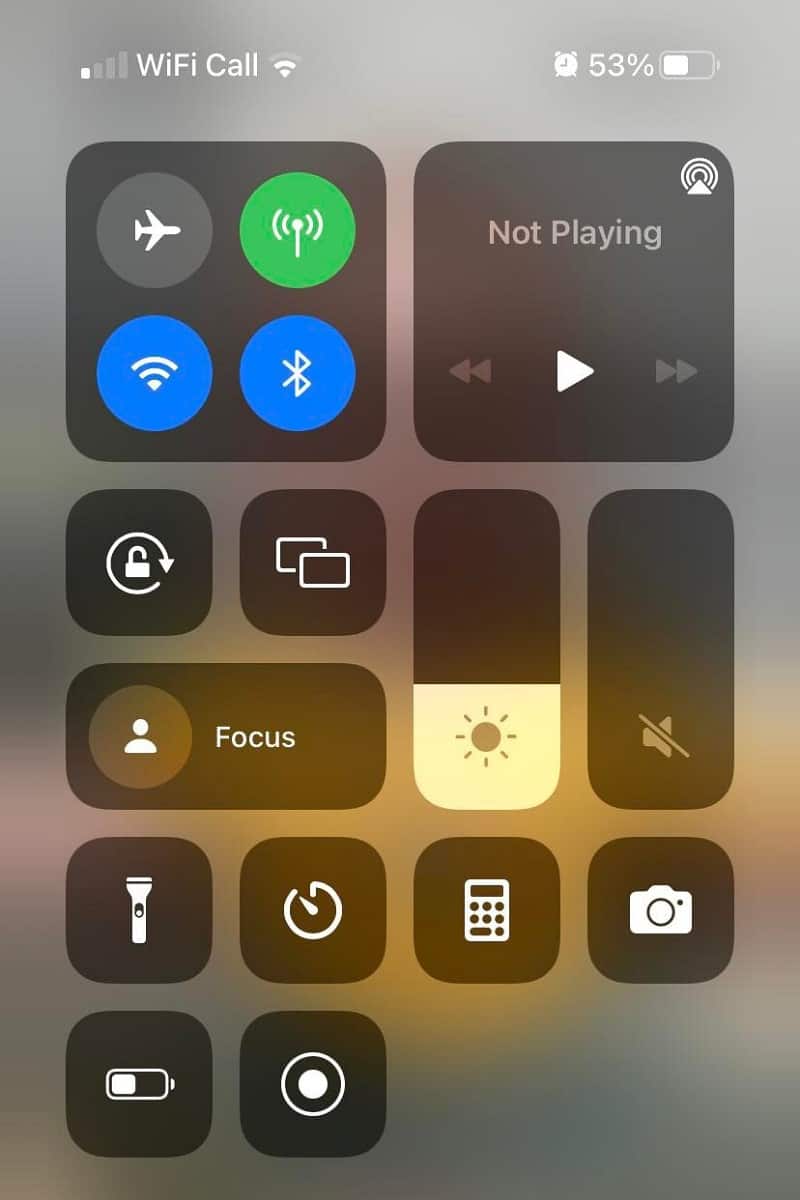
IPhones and iPads that still have a home button will access the control panel by swiping up from the bottom of the screen. However, users who no longer have a home button, will access the control center by swiping down from the top right corner of the screen.
Step
Click And Hold The WiFi Or Bluetooth Button
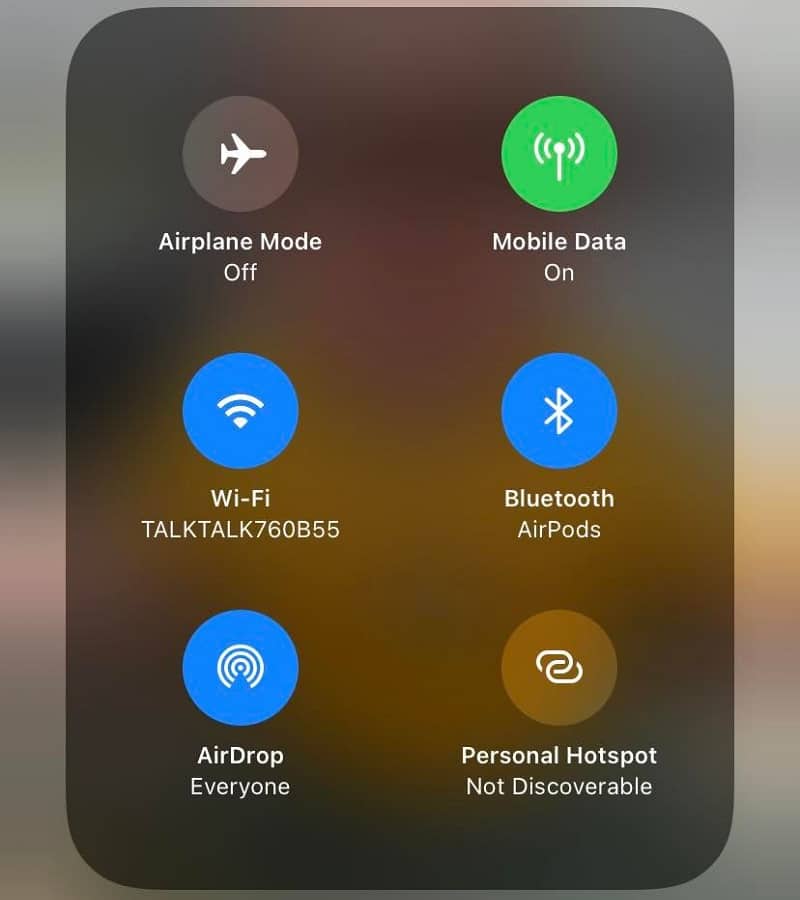
This will open a new menu that should consist of six widgets – Airplane Mode, Mobile Data, WiFi, Bluetooth, AirDrop, and Personal Hotspot.
Step
Click AirDrop
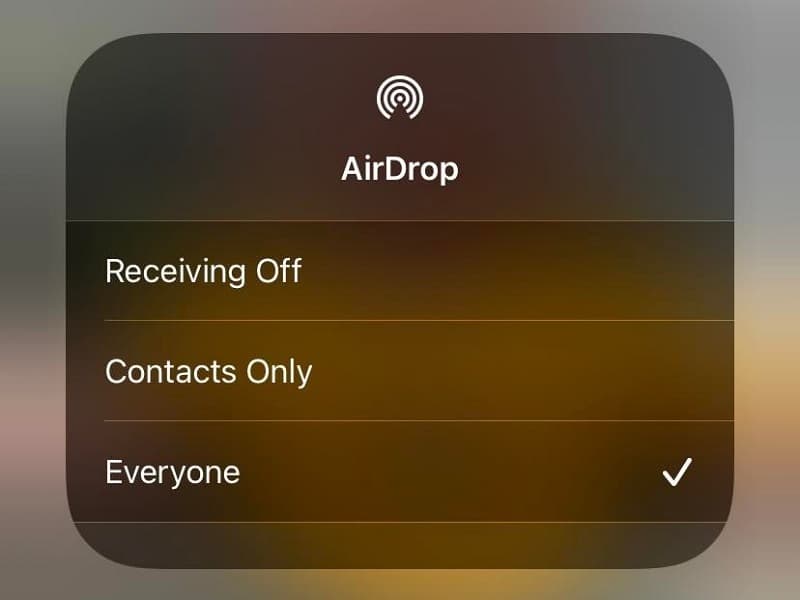
Now click the AirDrop button so that it also illuminates blue. You will now be introduced to a new menu that will allow you to set who you want to receive files from.
Contacts Only will allow only the numbers stored in your phone to be able to AirDrop you files, while Everyone allows any number to request an AirDrop.
Step
Send And Receive Files Through AirDrop
Now that your AirDrop is on, make sure that the other phone you’re wanting to connect with also has their WiFi, Bluetooth, and Airdrop on. Now you should be able to send and receive files from one another!
Turning AirDrop On With A Mac
You can also use AirDrop with Mac devices, which are Apple computers and laptops. Below are the steps on how to turn AirDrop on your Mac PC or laptop.
Step
Right Click On Your Mac Desktop
This will simply allow you to access the Apple Menu bar at the top of your screen rather than seeing one attached to whichever app you were using beforehand.
Step
Tap ‘Go’ On The Apple Menu Bar
The top of your screen should show an Apple logo, followed by a number of drop down menus. Find ‘Go’ and hover over it until the drop down appears.
Step
Click AirDrop
AirDrop will be sandwiched between Computer and Network, and it will have a round widget next to it. Alternatively, you could also use the command Shift+Command+R to skip the previous steps.
Step
Set Your Discovery Settings
From the new menu that has popped up, click the blue arrow next to the text ‘Allow me to be discovered by:’ and click either Contacts Only or Everyone. Now you will be able to send and receive files from other Apple devices.
Summary
If you own an iOS device such as an iPhone, iPad, or Mac, then you can easily turn AirDrop on. This makes it very easy to be able to share files between devices.
You can even share files over different Apple devices to make work easier! We hope that our article has helped you save time on sending files between platforms.