Last Updated on
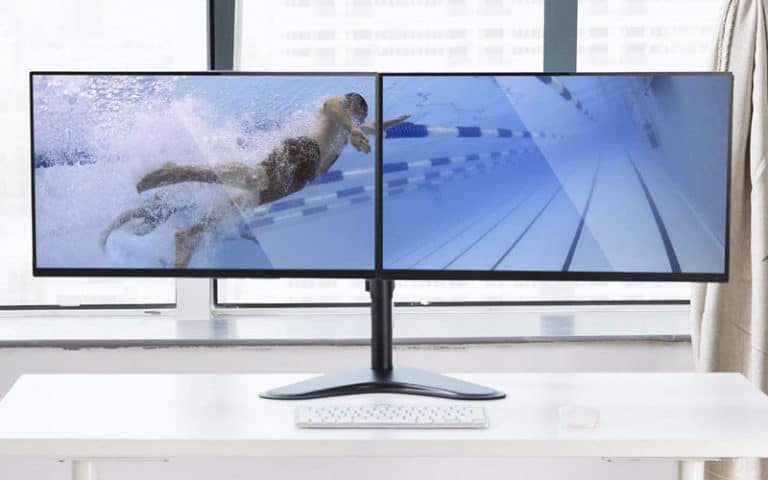
These days, rocking a dual or even a three monitor setup has become the norm, usually doing your work on one with the other(s) being there for either entertainment or for all the other Chrome tabs you have open. What some struggle with, and probably why you’re reading this article right now, is how to change your primary monitor in Windows 10.
It’s pretty easy to hook up multiple monitors as it’s just cables from your PC to the display(s) but when it comes to making the right one the primary focus, the settings are a little hidden.
We’re going to go through the ways you can change your primary monitor in Windows 10 both via the OS’ settings and if you have a dedicated GPU, through settings located there too.
How To Change Primary Monitor In Windows 10 Via Display Settings
While the setting to change your primary monitor in Windows 10 is slightly hidden, it’s super easy to do. Here are the four simple steps to get the job done:
Step
Open desktop options
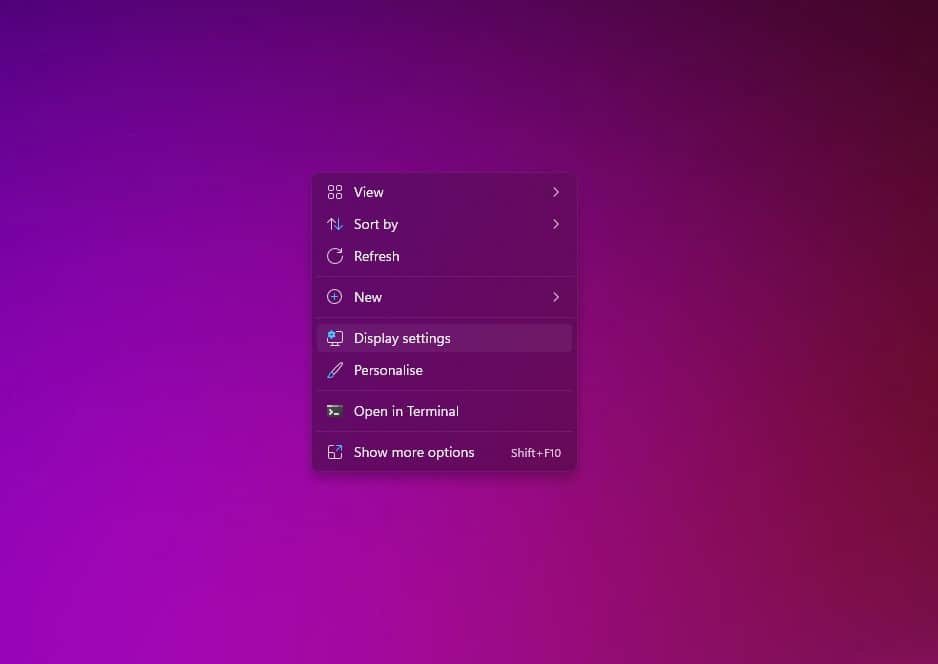
Right-click anywhere on your desktop
Step
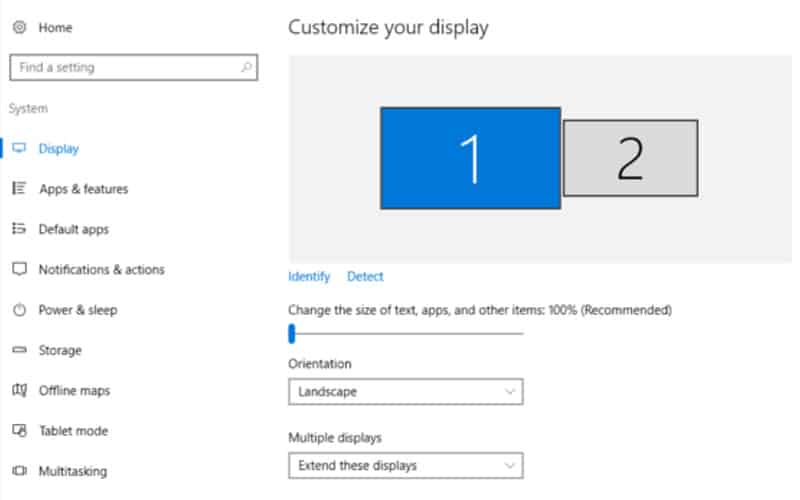
Display Settings menu
Select the Display Settings option
Step
Choose your primary display
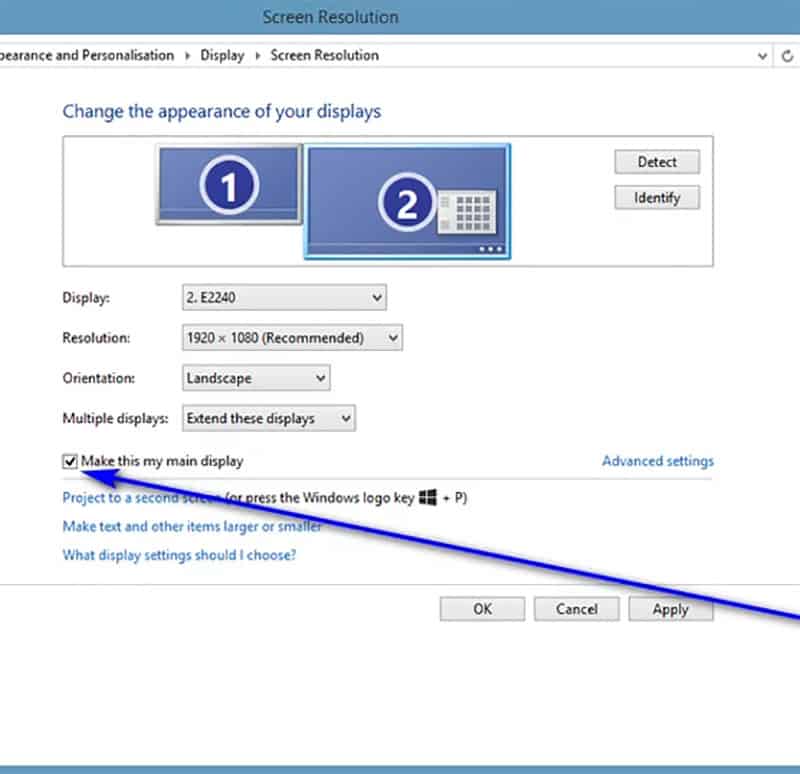
Choose the display that you want to be your primary monitor and hit ‘Make this my main display’
That’s it, you should have changed your primary monitor in Windows 10.
If there was some mistake or it didn’t go through for some reason, just follow the above instructions again and you’ll be golden.
How To Change Primary Monitor In Windows 10 Via NVIDIA Control Panel
If your PC has a dedicated NVIDIA graphics card, you can also change your primary monitor in Windows 10 via their proprietary settings program. This is known as the NVIDIA Control Panel and if you don’t have it installed on your machine already, download it here. Now, let’s get into the steps.
Step
NVidia Control panel
To open the NVIDIA Control Panel, right-click on the desktop and select “NVIDIA Control Panel” from the menu. Alternatively, you can click on the “Start” button and search for “NVIDIA Control Panel.” Once you’ve opened the NVIDIA Control Panel, you’ll be able to change any of the settings that you want.
The NVIDIA Control Panel is a tool that lets you customize the settings of your NVIDIA graphics card. You can use it to adjust the color, brightness, and contrast of your display, as well as the resolution and refresh rate. You can also use the NVIDIA Control Panel to change the way that your graphics card handles 3D applications and games.
Step
Multiple display option
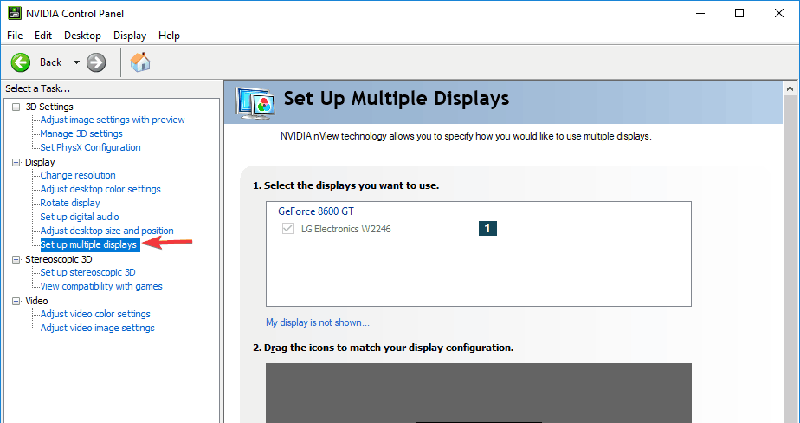
On the left-hand side, look under ‘Display’ and hit ‘Set up multiple displays’
Step
Select your primary display
Right-click on the display number you want as your primary monitor and hit ‘Make primary’
Click Apply, then get all of this confirmed by clicking ‘Yes’.
You should now have your primary monitor all ready to go. If something has gone wrong, just follow the above instructions again and correct any errors.
How To Change Primary Monitor In Windows 10 Via AMD Radeon Settings
Similar to that of NVIDIA, AMD also has a settings program where you can change your primary monitor in Windows 10. Again, if you don’t have this program installed, you can do so by clicking here. Without further ado, let’s get started.
Step
Open AMD Radeon Settings
To open the AMD Radeon Settings, right-click the Desktop and select AMD Radeon Settings from the context menu. Or, press and hold the Alt key and double-click the Radeon icon in the notification tray. The Welcome screen appears when initializing the AMD Radeon Settings
Radeon Settings is AMD’s gaming control panel, designed to give gamers fine-tuned control over their games and gaming PCs. It’s packed with features that allow gamers to customize their experience, including game profiles, performance tweaks, and display options.
Radeon Settings also lets gamers record and share gameplay footage, and even stream live gameplay to Twitch or YouTube. Whether you’re a casual gamer or a hardcore PC gamer, Radeon Settings has something to offer. So if you’re looking for more control over your games and PC, be sure to check out Radeon Settings.
Step
Click Eyefinity at the top right of the window
Step
Quick setup
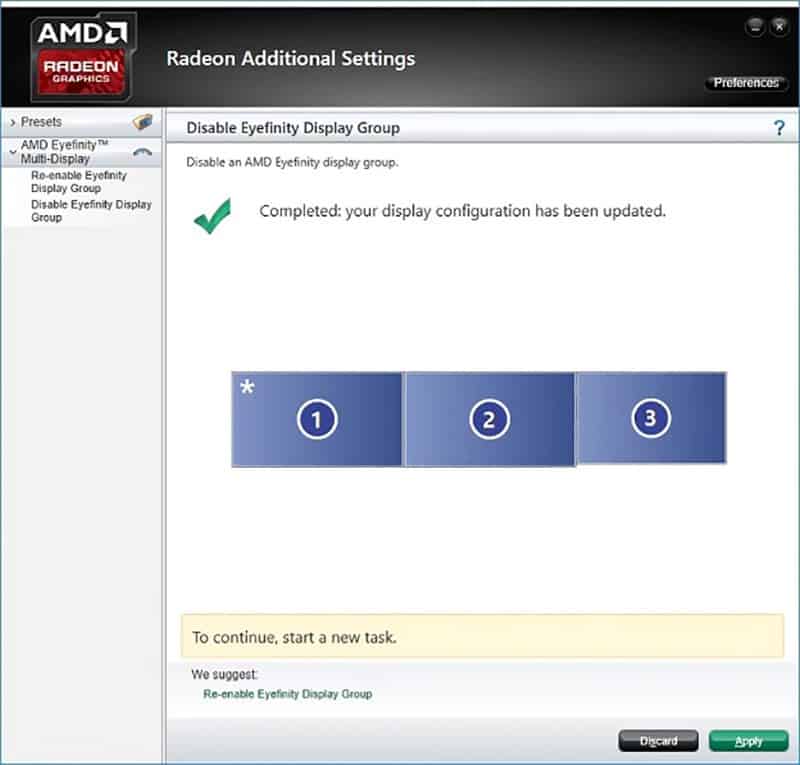
Hit ‘Quick setup’ to create a display group and input your monitors
Step
Arrange displays
Once you’ve created this display group, you should have the option to arrange displays. Click this option and arrange the displays in the order you’d like
Step
Save settings
Exit the program and your settings will be saved
And that’s that, you should have got your monitors all set up via AMD Radeon Settings, putting your primary display in the place you want it.
There we have it, three different methods for changing your primary monitor in Windows 10. The first method, via Windows 10 Display Settings is the fastest but if you do own a dedicated graphics card and would rather go down that route, you can.
Once you’ve got your primary monitor in place, you might want to change your refresh rate or even overclock it to get the most out of it. You can even learn how to clean it properly with our top tips.
If you’ve got yourself on the new Windows 11 OS, check out this article on how to change your primary monitor there also!