

Last Updated on
Using headers in Excel is a valuable way for you to be able to outline different sections of your spreadsheet. So they are an incredibly valuable tool when it comes to making your sheets more readable for other people.
The same goes for footers as well, distinguishing vital information that is important to a specific topic or information in a spreadsheet. These, therefore, are skills that anyone working on or with Excel should have handy. Unfortunately, creating headers in Excel is not as easy as it is in a Word document.
In this guide, we are going to show you just how to set and create headers in Microsoft Excel, as well as how to create footers.
How To Make A Header In Microsoft Excel
Despite being a little less clear than in Microsoft Word, Excel does still make finding the tools you need for making headers relatively straightforward.
Step
Add The Heading
Firstly, you will need to click on the worksheet to that you want to add the heading.
Step
Click The Header & Footer
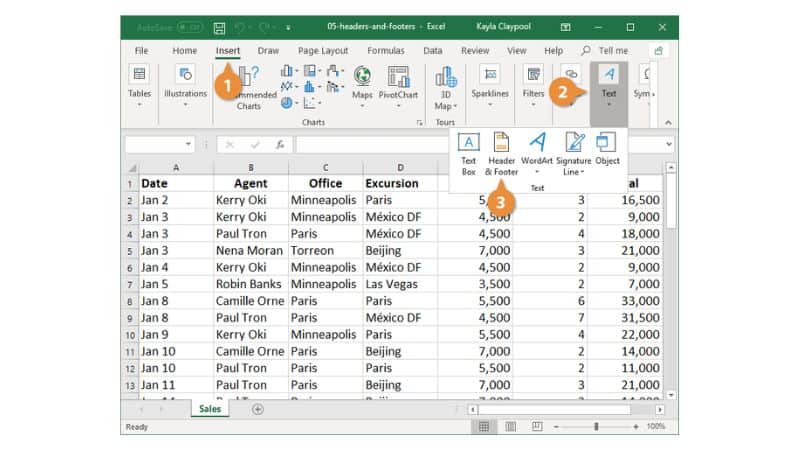
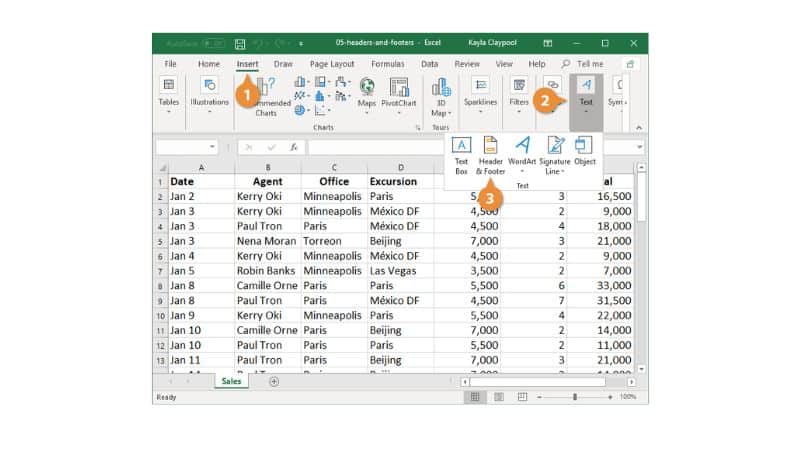
Then, when you are on the ‘Insert’ tab that is in the text group, you will need to click the ‘Header & Footer’ option. Once you have clicked on this option, you can now type in your header into the document.
If you want to start a new line of your header text, simply press the ‘Enter’ key on your keyboard.
If you want to close the header that you are changing, simply click anywhere else on the page. You will now keep the changes that you have made to the header, and your header will now be available to view.
Step
If You Want To Leave A Header Text Box
Alternatively, if you want to leave a header text box without keeping the changes that you have made to it, you can simply click the ‘Esc’ key on your keyboard, and you will have made no changes.
Something to keep in mind is that you can only view headings in the Page Layout or Print Preview settings, meaning that they may not appear as you intended in other viewing settings.
How To Create Footers in Microsoft Excel
Creating footers in your Microsoft Excel document is very similar to making a header, so the steps are going to be very similar.
Step
Add The Footer
First, you need to be on the worksheet that you want to add the footer too.
Step
Go To The Page & Layout
Next, make your way to the ‘Insert’ tab or Excel, then go to the ‘Page & Layout’ group in this tab, and select the ‘Header & Footer’ option.
Once you are on this option as you would be if you are selecting a header, you can now instead select the box that allows you to add a footer to your worksheet.
Step
Add Text
Once you have selected your footer option, then you can add text to it as you would a header. To make a new line, press the ‘Enter’ key on your keyboard, and to exit the footer box, click anywhere else on the sheet.
Step
Press The ‘Esc’ Key
Again, to leave a footer box without keeping any changes you have made, press the ‘Esc’ key.
Frequently Asked Questions
How Do I Delete Headers?
To get rid of a header from your worksheet, simply follow the same instructions as you would to add or edit an existing header, and press the ‘Delete’ key on your keyboard. The same works for footers.
Final Thoughts
As you can see, making a header in Excel (or even adding footers) is a very simple process once you know how to do it. Both are invaluable in properly organizing a spreadsheet, and so important tools to know about.